
Not cleaning the rims properly before plasti dipping can make them look really bad. And that is why it is extremely important that you do a thorough cleaning of the rims before plasti dip.
Cleaning the rims properly isn’t as easy as it seems. Just regular water and soap wash aren’t going to work.
Then how it should be done?
Well, that is exactly what we will be showing in this very guide. We have designed an in-depth 5-step instruction guide on how to clean rims before plasti dip.
Read through! Cleaning rims is about to become a piece of cake for you.
Necessary Supplies for Effective Rim Cleaning
Before we get started with the process, here is the list of items you will be needed.
- Washing bucket
- A used cloth
- Spray Nozzle
- Microfiber wash mitt cloth
- Soft Bristle brush (Scratch-proof)
- Wheel cleaner spray (Non-acidic)
- Wax stripping or degreasing automotive shampoo (For Non-ceramic coated rims)
- Wax-Free, pH-neutral shampoo (For ceramic-coated wheels)
Choosing the Right Cleaner Spray
How effective the cleaning will largely depend on the cleaner you use. So you need to be very careful when choosing the rim cleaner.
You will have to skim through hundreds of cleaners to get the right one. And due to the wide range of choices, it becomes hard to keep an eye on the ideal one.
However, let us enlighten you a bit about rim cleaners.
There are mainly 3 types of rim cleaners:
- Acid-based cleaners
- pH Neutral cleaners
- Iron and Fallout cleaners
1. Acid-Based Cleaners
Acidic cleaners are extremely powerful in breaking down old grime and stuff coatings on the rims. That being said, since their pH level falls between 5.5–6, they can cause damage to chrome-plated and alloy wheels.
2. pH Neutral Cleaners
Dedicated pH-neutral cleaners are widely used at the present time, and it is safe to use as well. This cleaner comes with cleaning agents that work best in taking out brake dust and grimes.
3. Iron And Fallout Cleaners
It is also a pH-neutral cleaning solution that is best suited to metallic components and paint-clear coatings. However, it has some ingredients which are aggressive; hence it is not suitable for Vinyl and plastics.
Effective Rim Cleaning Before Plasti Dip – Step-by-Step Process
Step 1 – Wipe and Clean the Rim
Grab a used clean cloth and wipe the rim. The cloth should be dry, and the goal is to get rid of all of the dust and break grimes as much as you can.
Step 2 – Water Wash
It would be best if you could use a pressure washer to water wash the rim, but it is completely fine if you don’t have one. Instead, you can use a spray nozzle with a hosepipe to wash the rim.
The perk of using a pressure washer is, if the rim has caked contaminants, the water pressure can break them effortlessly.
However, if you attach a spray nozzle to the hose pipe, that can also give a decent amount of water pressure, though that won’t be as much as a pressure washer.
What you want to do after is, wash the rims thoroughly with water. Try your best to break grime buildup and dusts with the water.
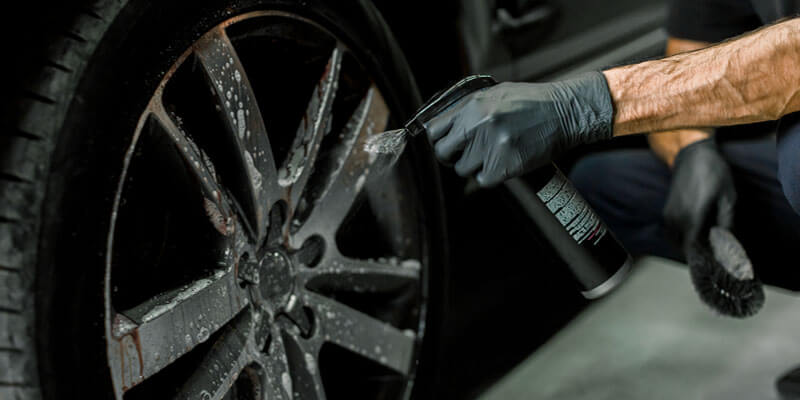
Step 3 – Using Wheel Cleaner
Once you are done washing the rim with water, now it is time to bring the game-changer, the wheel cleaner!
Whatever wheel cleaner you have picked, make sure that it is suitable for your rim. And follow the instruction that comes with the cleaner.
Cleaners work differently. Some need to be sprayed on the rim, then sit for a few minutes and then rinsed. When you are using such cleaner, make sure to spray on every nook and cranny of the rim, which includes the bolt section as well.
On the other hand, cleaners like pH neural need brushing. If you are using a dedicated pH-neutral wheel cleaner, then you are required to brush after you spray.
Take the soft bristle brush, and keep brushing every area of the rim using the cleaning solution.
Step 4 – Using Automotive Shampoo
Rim cleaners come with aggressive chemicals which are safe to use. But they are meant to be washed off after some time. Otherwise, they can harm the rim.
Aggressive chemicals on cleaners are bad for alloy and chrome-plated rims. Therefore, when used on such rims, they need to be washed off as soon as possible.
And just water washing isn’t enough to get rid of them properly, which is why you should use an automotive shampoo or soap.
If your rims are ceramic coated, then you will need to use a wax-free pH-neutral shampoo. And for non-ceramic coated rims, wax-stripping shampoo or soap will be fine.
Apply shampoo on the rim, use a cloth to rub the rims, and then after a while, wash with water. Do not forget to clean the inner side of the rim as well.
This should be enough to get rid of any chemical residue left on the rim.
Step 5 – Use Microfiber Cloth
Once you are done washing the rim properly, both the inner and outer sections, now it is time to wipe clean the rim with the microfiber cloth. Do not use a microfiber cloth that you have used before to clean anything. Use a fresh one. And before you plasti drip the rim, make sure the rim is dry.
FAQ
Plasti dip comes in so many different colors that you can choose from. There are matte black, silver, gold, white, and other vibrant colors are also available.
The pH-neutral shampoo cleanses the road grime without leaving any residue behind and washes off easily. The proper pH balance is harmless when you need to do delicate cleaning on your car. So, rather than normal cleaners, this pH-balanced shampoo will help you clean the rims without doing any harm to the rims.
The durability of the plasti dip will depend on how you are going to use it. If you take proper care of it, it can last up to three years without needing any retouching. Of course, you can always retouch if any damage happens while driving your car.
Conclusion
It is best to clean your vehicle wheels regularly. Long breaks from cleaning will allow the dirt and grime to be caked on the rim. And that will make cleaning pretty daunting.
However, if you have gone through the entire guide, you have already learned how to clean rims before plasti dip. And if there is any confusion, do not hesitate to hit us through the comment section.
Read more:
- Cleaning Brake Rotors Without Removing Wheels – How Effective It Is!
- How To Clean Carbon Fiber – Easy And Effective Ways!
- What Is Used To Clean The Fuel Entering The Engine?
- How To Clean Stainless Steel Exhaust: 7 Steps You Must Follow
- How To Clean Raised White Letter Tires – Method That Works Like Magic
