
It is natural for spark plugs to wear out gradually and naturally. This is due to higher temperatures that cause the carbon fiber wire insulation to wear out. Then it goes without saying that they need to be replaced over time.
If you ignore the problem for too long, the wires will begin to leak voltage to neighboring engine parts.
But, how do you open spark plug wire clips? It might seem like a daunting task and we won’t lie-it is important to carry these tasks out neatly. Therefore, we are here to guide you with our revised steps for opening spark plug wire clips.
Tools Required for Carrying this Project
Here are the tools and materials needed for opening spark plug wire clips –
- Wire Puller
- New spark plug wires
- Rags
- Dielectric grease
- Spark Plug Boot removal tool
Guide to Removing Spark Plug Wire Clips
An additional tip before you start your project is to take a picture of the layout of your spark plug system. In this way, you can easily try to match your updated work with the pictures and run checks to determine if all is done well and right.
Step 1: Check the Hood
Vehicles differ, and so do the time of plug system they come with. Try checking underneath the hood first and foremost to find out if your vehicle even uses spark plug wires.
This step is essential because, with the growing technologies, many newer vehicles come with ignition coils rather than the conventional spark plug wires and distributors.
Step 2: Know Your Vehicle
After confirming the presence of spark plug system in your vehicle, analyze its content.
Look at what exact fit they are made for. Look up and find the vehicle type, model, and manufacturer dates. This is required because it is crucial for you to ask for the specifically made spark plug wire kit that is only made to fit the system of your ride.
Step 3: Lay Wires Out
Now moving on to the project activities, simply lay out the wires over a flat surface to find their maximum length and extend them over.
Step 4: Check Out the Wires
Some wires come numbered while others do not. Therefore, you must now check the ends of the wires to find numbers.
In further steps, you would need to align wire numbers and replace them one at a time to match with old likewise numbers.
Do not scratch your head if you do not know what we are talking about. We will enlighten you soon.
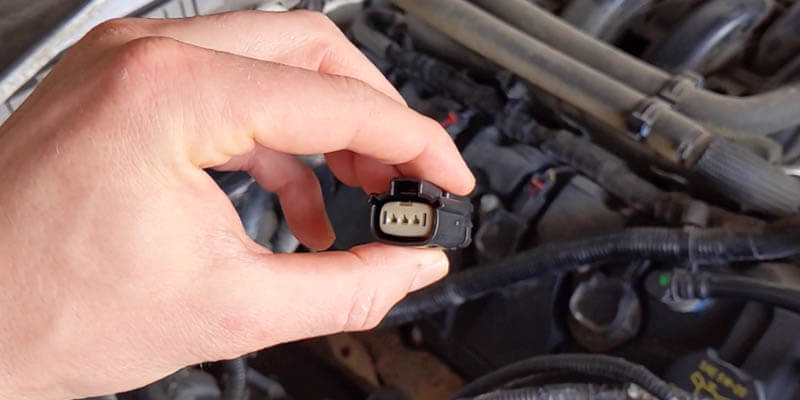
Step 5: Using the Smart Plug Boot Removal Tool
In this step, first, decide which wire you intend to remove at first. Then, focus on one end of the wire that is now old in the distributor and initiate the removal.
Slowly, focus on the remaining end and reuse the tool to disconnect the wire completely from the distributor. Make sure not to pull the plugs. Rather, be patient and firmly grip the plug while you twist it gradually until removed.
Additionally, you might find it hard to locate the spark plug boot. Find it around the rubber housing parts that exist on the ends of all spark plugs.
Using the removal tool is important because using alternate tools might end up damaging the plug system.
Step 6: Comparison of Wire Lengths
As we had mentioned in Step 4, at this point of the project, you have to try aligning the wires and check their lengths (even if they are not numbered).
Manually, match the lengths of the spark plug wires.
Step 7: Lubricating the Plug Wires
This is one simple step. Proper lubrication and greasing are important for the wires to work smoothly.
Therefore, it is alright to apply the dielectric grease with your fingers on the surface ends of each wire one by one.
Step 8: Reinstallation of the Boot System
After you are done with the match and catch of the spark plug wires, simply put back the boot upon pushing it back on the spark plug and then the distributor.
Check for hearing the “click” or a likewise sound it is supposed to make, indicating a successful reinstallation.
Step 9: Cross Checking the Project
If you remember the additional tip we gave you at the start, then look at the photo you had taken of the system previously and match it with your updated project.
Check to see if the layout and wire patterns are similar at first. Make sure it is not touching any parts of the warm exhaust of the vehicle or with any parts that stay in motion.
Step 10: Repetition for Perfection
In a case, the wire alignment does not look like a success, keep repeating our advised procedure until everything looks good and in place.
Step 11: Conducting and Marking End Checks
At this final step, check if everything is in place. However, we must tell you that one wire would be a bit longer than others-like six or eight inches. This wire will be the one that starts from the ignition coil and goes back to the distributor.
We are telling you this now because this replacement is the final step to carry.
FAQ
Yes, it used to be! But with modern advancements and the famous boot removal tool, it is not that big of a deal anymore.
The ideal miles in between which spark plugs must be changed should be between 60,000 and 100,000 miles.
Yes, it is possible. However, it will still involve a lot of attention to detail. Check for the numbers and lengths as we mentioned in our steps above.
Conclusion
We tried our best to guide you through every step of the procedure of removing and replacing spark plug wires. We hope we were able to answer your queries about open spark plug wire clips.
Additionally, we care about you! Therefore, always check if the engine is hot before you start your work; you do not want injuries from insincerity in such detailed work. Good luck!
