
The seals on the spark plug provide air-tight features around the tube. Unfortunately, escaping oil from a tube seal means it needs replacement. If there you are, read this article to learn how to install spark plug tube seals. Since oily spark plugs can lead to life-threatening moments or misfires, know that it’s an emergency.
How To Install Spark Plug Tube Seals Honda
As a petrol head, your frustrating search is over. Get a fresh idea of how to install spark plug seals. Without further ado, let’s dig in.
Materials You Will Need:
- A suitable workspace
- OEM tool or hefty screwdriver with a straight head
- Lubricant Oil or liquid soap
- Scissor or any sharp tool
- A hammer
- A gripper
- A 30mm socket
- A piece of solid wood
Find the Location of the Seals
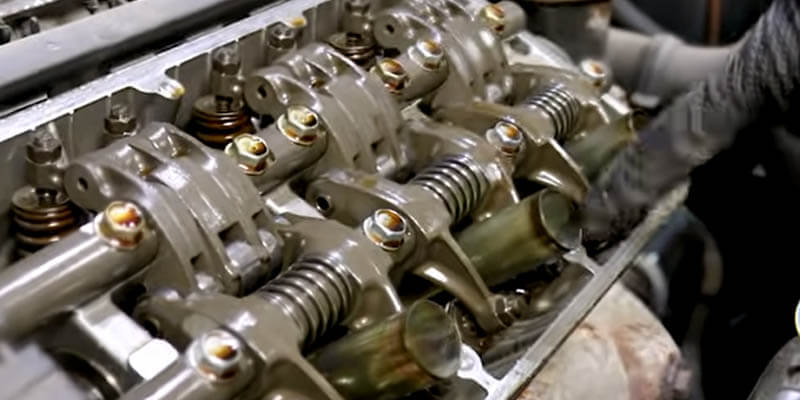
If you got the latest type of car in your garage, then you will get the spark plug into the cylinder top. It means the hole in the valve case holds the spark plug. In this case, you need to pull out the valve cover to get access to the seals. Since they are not built-in, they are removable and easy to replace. However, if your car has built-in seals, you have to replace the entire valve cover.
Take off the Valve Cover
Detaching the valve cover is easy peasy. Just unplug the spark plug wires and disconnect 2 PVC attachments from the throttle body. Now you can get the valve case out. Once you remove the valve cover, accessing the tube seals is easy. Keep them in a convenient workspace. You can use a workbench, either.
Clean the Surroundings
Wipe the oil and brush the dirt around them all the way. A clean and clear surrounding place will help you while the repair is on the way. The drives will not slip, and things will remain on the spot. If needed, utilize any organic cleanser to remove the spreading fried oil. Then, rub the bottom of the tube all around with some sleeve retainer to strengthen the fit.
Remove the Old Spark Plug Seal
At first, the tube may seem incorporated and stubborn to merge with the metal vents and valve edge. Then it’s time for you to show it some plentiful energy so that the seals come out.
Stuck seals can surprise you with exhausting noon, by the way. Constant dragging or hauling of them can harm the surrounding assembly. But with proper knowledge and spark plug tube seal removal tool, it becomes easier. So, here are some crucial ideas in order to pound them:
- To accomplish this job, choose ply bars from the OEM tool to get it done easily. No hard tools to pull them out? Make use of scissors, an insulated screwdriver, or a burr tip to cut the lips of headstrong seals.
- You can also choose a hefty screwdriver with a straight head that can do heavy tasks and fit through the spark plug holes.
- Now, watch carefully, and mark the tiny space at the bottom of the tube. Puff your tool from the top in that hole and jiggle it. Push the edge of your sharp flat device and dig into the hole.
- After that, you can use a hammer to tilt and smack the rubber up. Try to get them off harder by snapping up your tool under the base. Repeat this process with your mighty thumb until you meet the twisting grope.
- I hope now the majority of rubber will leave in one-pieces. You may see some metal slices glued at the edges of all sides of the tube. Make use of some oil and rub them around the seals. Then, cut them apart with any sharp tool.
- Once you succeed to cut the most way through, bend it to grab it with a gripper. Watch coming all with a few joggles. To make your next installation easy, a trick is to remember the direction in which you installed them.
Finally, the O-ring is free and detached from holes. Bear in mind that it is smoother to install new seals in a fresh and clear tube hole.
Place New Spark Plug Seals
Right away, we are in the final round. Placing a new seal is not as hard as plucking the old seals though.
A trick to get this done easily is bending them slightly before putting them in the tube hole. Hope you are not those who thought of melting them with a heat gun to make them flexible! Here is some easy step by step procedures that you can follow:
- First, spray dishwashing soap or motor oil around the new seal. It will help the seal to go in easily.
- Locate the seal in the tube hole and press it using your thumb as much as you can.
- Use a 30mm socket lined up with the border edge of the seal as spark plug tube seal installer. Take a solid wood piece and place it on top of the socket so that the socket remains safe.
- Force them in nearly as possible. It may require massive force, so don’t hold back.
- Beating them in with a hammer is not a bad idea though. But make sure the force is not scuffing them up.
- Some more whacking from the top, and voila, your new seals go in successfully.
- However, if you fear any leakage caused while working, coat the seals with RTV Silicone.
- Repeat this procedure to install all the seals.
And, great, the seals of spark plug tube replacement are done.
Warning:
Though installing a new seal sometimes requires a hard beating, it can damage your valve cover if it’s made of plastic. I am sure you don’t want to break them into pieces and pay some extra bucks.
So, you need to work carefully in this case. After removing the old seal:
- Set the new seal on the bottom.
- Apply downward pressure with your finger around them.
- Tap and go through the area until it goes deeper.
To be honest, it may take some time, but worth it. Finally, you can use a soft-faced hammer to pound them in.
FAQs
While installing spark tube seals, keep the tapper level in towards the motor. Switching them backward can affect accuracy.
You can try coating the seals with RTV Silicone as dressing or replacing leakage. It will safeguard your tube seals more efficiently.
Rub some oil or spray liquid dish soap mixed with water all around the edges of the seals. It will assist the seals to slip over through tube holes smoothly.
Conclusion
The seals are made of flexible rubber but strengthened with steel threaded shells throughout. This is why they looked almost welded with the valve tube. In the first shot, the seals may show the sign of brittleness but no worries.
