
With vehicles, the spark plug will deteriorate over time, and you will be able to observe it from your engine’s performance. A common rule to keep your car in good shape is to look for damaged spark plugs every 30.000 miles and replace them if necessary.
The most common way to investigate worn-out plug tubes is to look for oil on the ignition coil or the bottom of the spark plug. Well, for a startup, how to remove spark plug tubes from head? We are here to talk about it and give you a clear idea related to this topic.
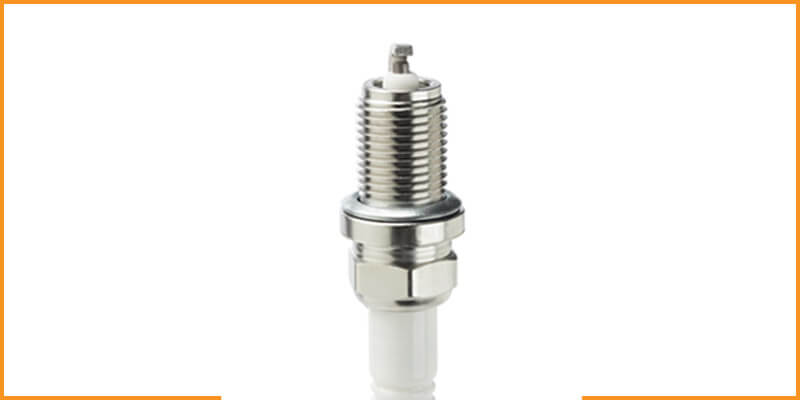
How to Remove Spark Plug Tubes from Head – Step by Step
Removing spark plugs and the tube can be very complex if you are not familiar with the right way to do it. This is a step-by-step procedure to make sure you can work on the engines with perfection.
Step 1: Inspect the Main Problem
Observing the performance of your vehicle is the way to do it. For example, you can have a faulty plug wire and not a spark plug tube issue. Wires can get damaged due to high voltage flow.
This will induce a lot of resistance and less current flow, which can result in burnout on the wires protective shield casing. You might find a spark plug seal removal tool handy in this case.
On the other hand, if you see your car making bumpy idling and inducing coughing-like noise, then there could be problems with your spark plug tube, and thus it needs to be replaced. Of course, we are talking about tube replacement today so let’s check out what are the essentials to perform this particular task.
Step 2: Gather All the Necessary Tools
Before you jump on to remove the spark plugs, be sure that you have all the required tools to perform a stealthy operation on your car’s engine. We call it operation because it is an intricate process but nothing impossible. All you need are the right set of equipment to dismantle the tube and re-fix it again.
What you need:
- Valve cover gasket set
- Screwdriver
- A mallet or hammer
- Woodblock
- Brake cleaners
- Newspaper
- High impact socket
- Vice grip or Pliers
Step 3: Turn Off Your Car
Never work on an engine that’s on running ignition. Doing so, you are prone to burning your hands. So, wherever you are, drive or tow your car to a safe location and ensure that the car engine is shut down. Once you are done, you are good to proceed with the removal technique.
Step 4: Put Off All the Bolts Wires from the Brackets
Before removing the spark plug wires from the top, label them so that it can help you put back everything in place once you are done. Next, you must look for the bolts that connect the valve cover to the coil.
Now move out the fresh air hose from the valve cover and the hose that connects the PVC. You are not done yet, and the bracket wires will have to be removed as well so that you get working space to replace the cover.
Step 5: Remove the Valve Cover
First, open the vehicle bonnet, then you need to pull off the valve cover before digging your hands into the spark plugs. To do so, you will need a wrench and nothing else. Again, it’s fairly simple, and anyone can do this.
The gasket toolset will be helpful here. Next, work on the screw bolts with the torque wrench. Always look for oil leaks when performing this stem. Aluminum covers can easily crack, and steel ones are prone to warping.
Move out the throttle cables, PVC hoses, and spark plug brackets, and then move on to pull off the valve cover bolts. The mallet is used to tap on the top to remove the cover grips. Use a newspaper to cover the engine to protect it from unnecessary spilling.
Keep in mind if the gasket is sitting on a groove, you must be gentle with it and not scrap it, which can cause leaks. On the other hand, if everything is done to perfection, the valve cover should come off easily.
Step 6: Pulling the Spark Plug Tubes
Moving on, now you will need the high-impact socket to disassemble the tubes from the head. Again, this is the part where you be careful not to go hard on the clamping, or it can make the plug heads falter.
Start by placing the high-impact socket on the tube head. Then clamp the plier onto the tube top at a length that makes it easy for you to maneuver the back and forth movement. When latched on to the tube, move the give drip with your hands to loosen the spark plug tube.
It can take some time to disassemble the tube; if this is the case, don’t rush. You don’t want to hinder the structural integrity of the tube by forcing it with fast movements with the plier.
A bit of patience and effort will be able to pull off the spark plug tube. Spark plug tube replacement is not rocket science. Once you have taken the tubes apart using the step we just mentioned, you will be fine to proceed to the next step to fix the tube seals.
Step 7: Remove Sparkplug Tube Seals
As you have already removed the gasket, now it’s time to put it upside down and remove the tube seals. You can do this by using a mallet and screwdriver. First, put the screwdriver in between the seal seat and the seal, now tap it with the hammer to make it loosen up.
Now it’s time to crush the seal using the screwdriver. This might need some angling and force to unearth it. Repeat the same process on the other valve holes. Make sure to pry out the seals from the edges of the valve using the sharp end of the screwdriver.
Once the process is done, you can just go with the spark plug tube seal replacement straight away. Then, put in the new sealants just by reversing the technique you used here.
Step 8: Cleaning and Replace the Tubes
The basics of spark plug tube cleaning are done by using brake cleaners, but it doesn’t stop here. Flushing out the valve where the tube goes in is also the key to attaining oil-free tube installation.
The well on the valve usually collects a lot of oil. To efface the residue from the inside, use a newspaper cutout to attract all the oil remains. Next, it’s time to dig into the main hole. Use the screwdriver and cover it with the rag. Finally, use the pointy end to spray some brake cleaner and put it down the well to give a final cleansing.
Replace the tube with cleaner ones and put it back on the head. Setting it down can be tricky here; you will need a piece of wood to cap the tube top with a mallet. Now fix the wirings and hoses, reversing the techniques you used to unlatch them in step 4 and put back the valve cover, and you are done.
FAQ
The main purpose of spark plug tubes is to keep away the oil under the valve cover from reaching the spark plugs.
Yes! If the spark plug seals are hampered, the oil can flow out and mess things up. This is why we mention in this article why it’s crucial to remove spark plug seals and replace them.
The moment you head, your engine makes weird cranky noises. If you see a fall in the performance, frequent stoppages, jerkings, accelerating issues, and more gas consumption than usual, then you might need to change the sparkplugs and clean the tubes.
Spark plugs are hard-wearing components and don’t die out easily. But as every vehicle and its use is different, you should always inspect the plugs and tubes after every 30k to 90k miles.
Conclusion
If your vehicle is emitting an odd smell, not working the desired mileage, or being shaky while accelerating, then the spark plug tubes might be contaminated. Therefore, knowing removing spark plug tubes from head is vital for any car owner.
This is not a difficult task and can be done solely if you have the patience and don’t have the scope to visit the service garage. Follow the step-by-step procedure in this article and remove the spark plug tubes like a pro.
